Creating a professional blog with Hugo, Github and Cloudflare Pages
Introduction
This blog has been created completly free utilizing Hugo (An open-source static site generator), the Hugo-Paper Theme, GitHub (As the code repository/builder) and Cloudflare Pages as the host. The reason I went with Cloudflare Pages vs GitHub Pages is simple, You need to be on a paid GitHub plan to use a private repository, if I want to leave things in draft/I’m just playing around with formatting etc. I don’t want the world to see all of this. Yes I could put it in another branch etc but it’s still not what I personally wanted. This blog will show you how to create an exact replica of this site for free!
Assumptions
- You already a Cloudflare Account and your DNS records are hosted on Cloudflare
- You already a Github Account
- You are using a Windows PC
Steps
-
Create a new private GitHub repository and call it whatever you wish, Mine for example is called Blog
-
Install Hugo on your PC and create a new site/post/tag with the following commands
winget install Hugo.Hugo.Extended hugo new site my-blog cd my-blog git init git submodule add https://github.com/nanxiaobei/hugo-paper themes/paper hugo new content posts/hello-world.md hugo new content tag/hello-world/_index.md -
We are now going to edit the hugo.toml file in the root of the my-blog directory to make your site yours. Here we adjust the title, change the theme and add your LinkedIn/GitHub
baseURL = 'https://example.org/' # Add your Blog's URL here languageCode = 'en-us' title = 'My New Hugo Site' # Add your title here theme = 'paper' [params] mode="auto" useCDN=true subtitle = "" # Add a subtitle here github = 'YOUR_GITHUB_ID' # github.com/YOUR_GITHUB_ID linkedin = 'YOUR_LINKEDIN_ID' # linkedin.com/in/YOUR_LINKEDIN_ID #rss = false # show rss icon [[menu.main]] name = "Home" url = "/" weight = 1 [[menu.main]] name = "About" url = "/about" weight = 2 [[menu.main]] name = "All posts" url = "/posts" weight = 3 [[menu.main]] name = "Tags" url = "/tags" weight = 4 -
You can now test your Hugo server locally, in the root directory of my-blog. Run the command below and this should start a webserver on http://localhost:1313 with your blog.
hugo server --buildDrafts
- Now we need to create 2 more files, a .gitignore (We don’t need to include the /public directory as that is for Hugo when it does it’s magic and builds the site, same with the lock file) and a Github Action to deploy your website on a schedule
.gitignore
/public/
.hugo_build.lock
.github/workflows/dailyDeploy.yml
# Simple workflow for deploying static content to GitHub Pages
name: Call Cloudflare pages webhook

on:
  schedule:
    - cron: "0 21 * * *" # 2100 GMT time - Use https://crontab.guru/ to build your schedule

jobs:
  deployment:
    runs-on: ubuntu-latest
    steps:
    - name: Call URL
      uses: fjogeleit/http-request-action@23ad54bcd1178fcff6a0d17538fa09de3a7f0a4d #Pin to v1.16.4
      with:
        url: ${{ secrets.URL }} # Your webhook is set as a secret as anyone can call it use your 100 builds per month
        method: 'POST'
- Next we need to add all of the files to your GitHub repository
git remote add origin https://github.com/[ENTER-GITHUB-USERNAME-HERE]/[ENTER-REPO-NAME-HERE]
git branch -M main
git add .
git commit -m "initial commit"
git push -u origin main
-
Now we are going to create the Cloudflare pages configuration
- Log in to the Cloudflare dashboard ↗ and select your account.
- In Account Home, select Workers & Pages > Create application > Pages > Connect to Git.
- Select the new GitHub repository that you created and, in the Set up builds and deployments section, provide the following information:
Configuration option Value Production branch main Framework Present Hugo Build command hugo Build directory public Environment Variables HUGO_VERSION 0.128.0 -
Your blog should now successfully be deployed on Cloudflare’s global network and be accessible on the internet!!! We now need to tweak a build setting so that we don’t hit Cloudflare’s Free plan limit of 100 builds. In Cloudflare pages, Select Settings and Branch Control and set Preview branch to “None”. This will stop Cloudflare building your “dev” branches on every commit.
-
To enable your custom domain, In Cloudflare pages select custom domain, enter in a domain that you own and is connected to Cloudflare’s DNS. Hit next and Activate domain. This process takes about 5 minutes.
-
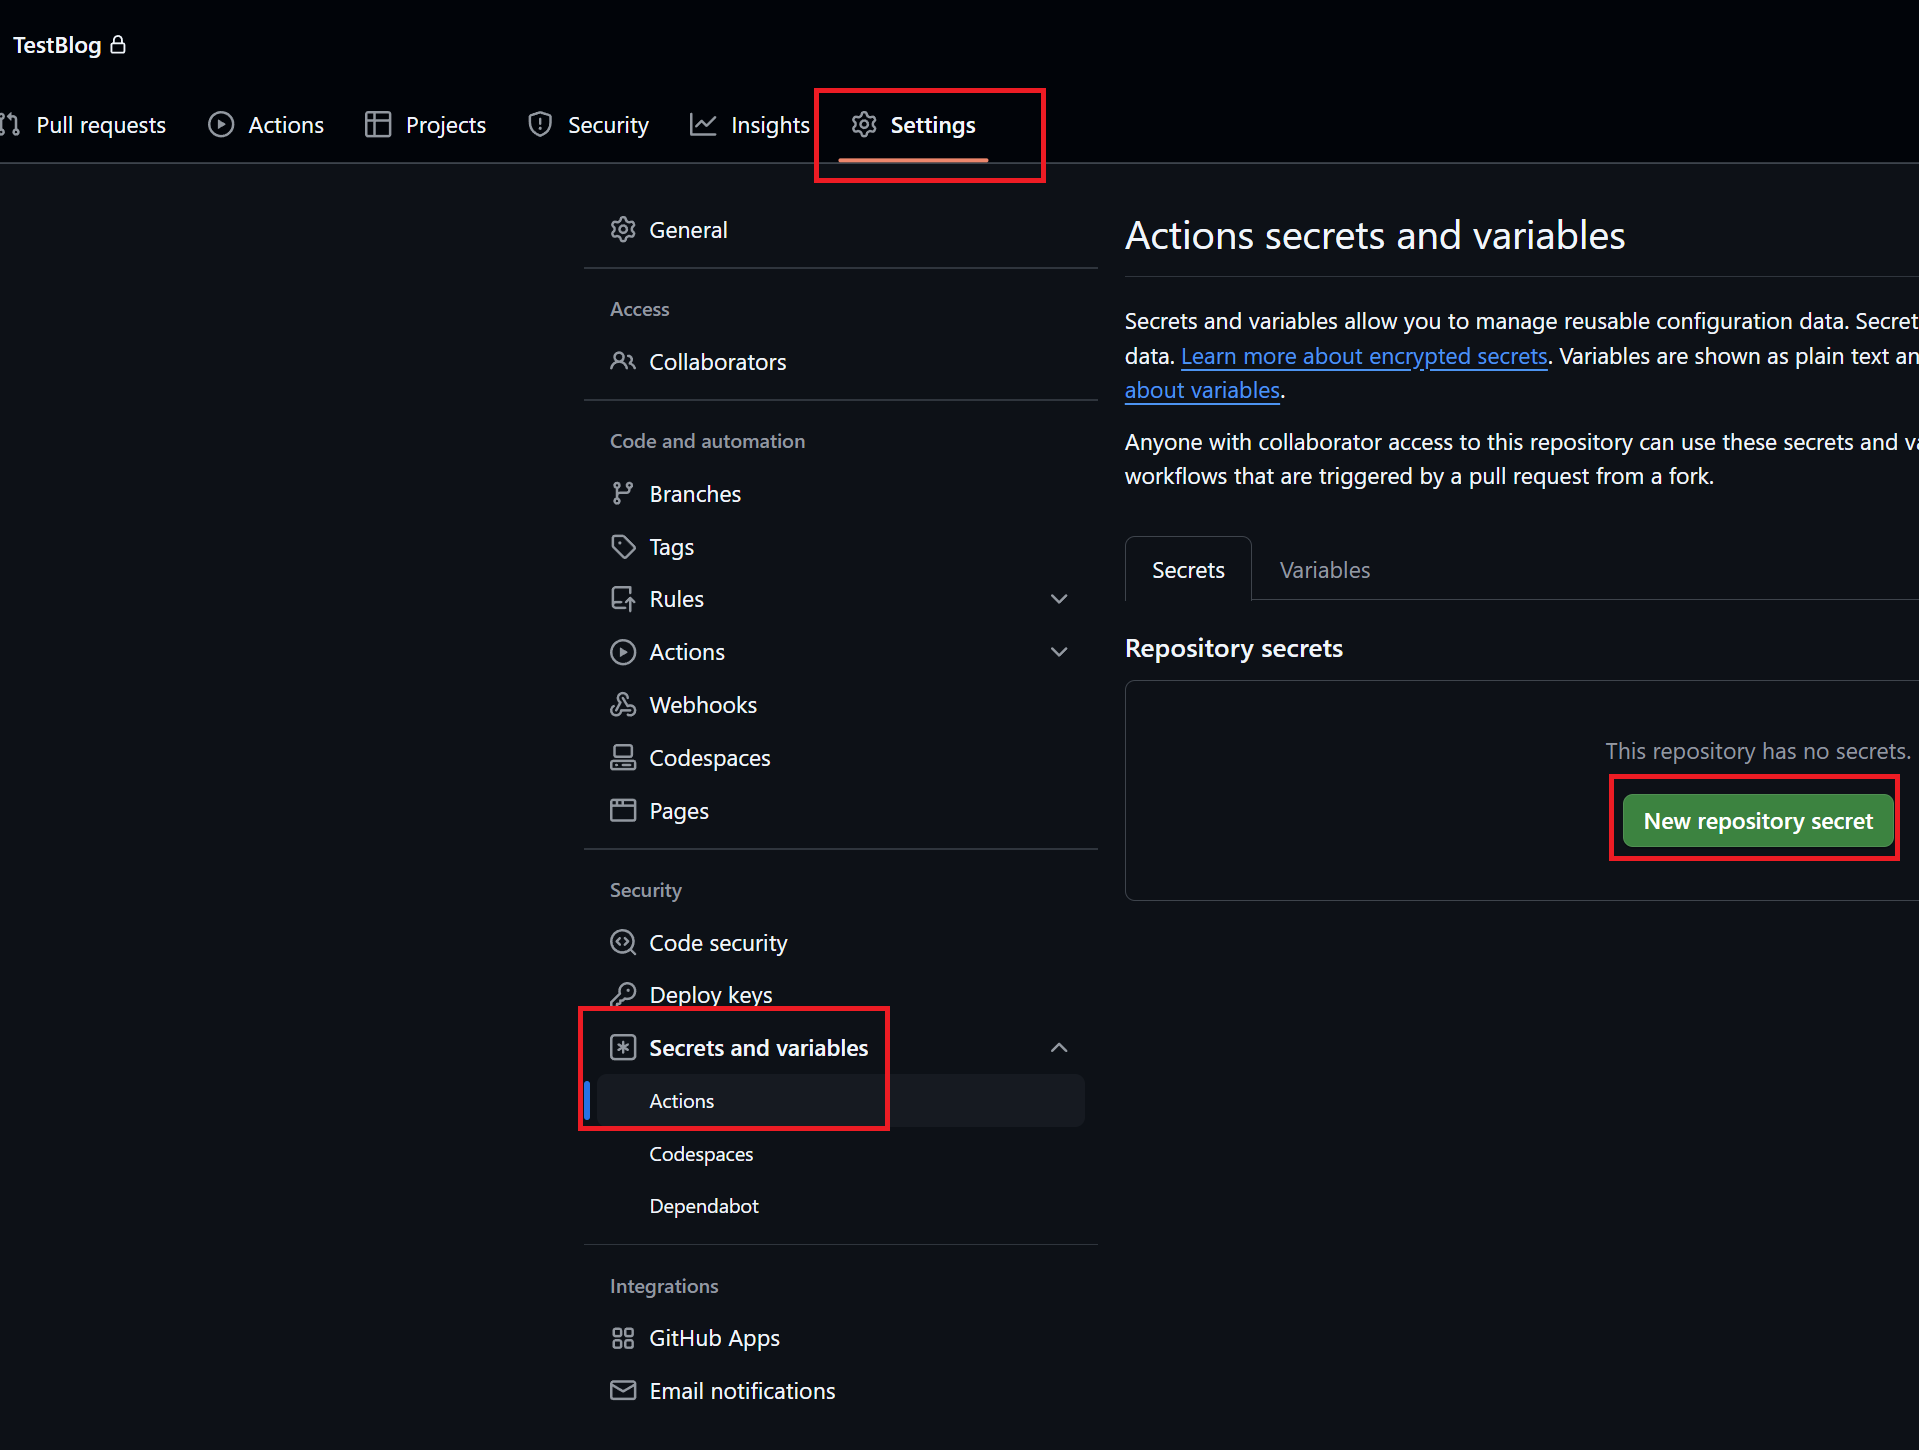
To configure nightly builds, we need to create a Deploy Hook and that add that URL into your GitHub Actions secrets. In Cloudflare pages, Select Settings and Deploy Hooks, Create a name (e.g. nightly-deploy) and keep the branch to build as main, Copy the provided URL and go back to your GitHub Repo. Select Settings -> Secrets and variables -> Actions -> New repository secret
Configuration option Value Name URL Secret The Cloudflare Deploy Hook URL
-
There is one last step which is to enable Notifications in Cloudflare incase your site fails to build. In the Cloudflare Dashboard (Account Level), Go to Notifications and Add
Configuration option Value Product Pages Notification Name Blog - Failed Build Notification Email [email protected] Pages Project Ensure your Project is selected Environments Production Events Deployment failed -
Job Done! You have now successfully created a Hugo site on Cloudflare Pages with the code stored on GitHub and it will rebuild itself nightly, and if the build fails for whatever reason it will notify you!
References
https://developers.cloudflare.com/pages/framework-guides/deploy-a-hugo-site/ https://themes.gohugo.io/themes/hugo-paper/